10.4 Constructing angles
Measuring angles using a protractor
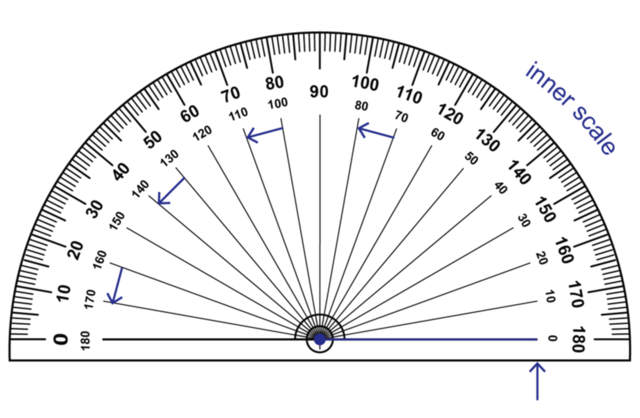
We use a protractor to measure an angle. We measure angles in degrees. The symbol for degrees is \(^{\circ}\).
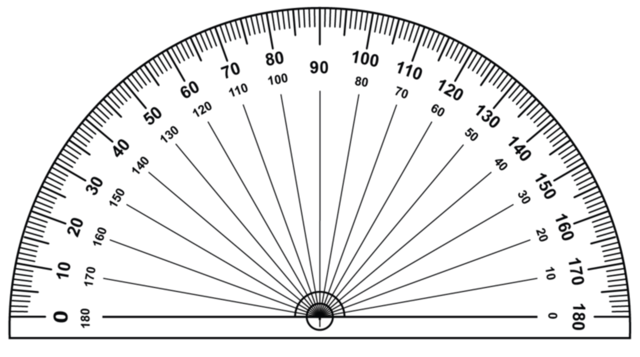
Take note of the following when you use a protractor:
- A protractor has a centre, which can also be called the origin. When you measure an angle, make sure that the centre (or origin) of the protractor is exactly on the vertex of the angle that you want to measure.
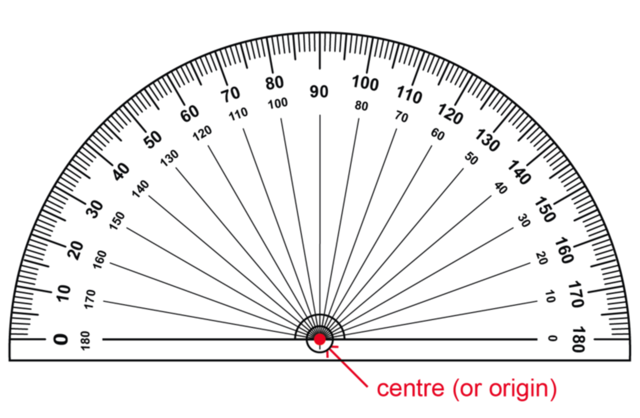
- The centre of a protractor is on the base line of the protractor. When you measure an angle, make sure that one side of the base line of the protractor is exactly on one of the arms of the angle that you want to measure.
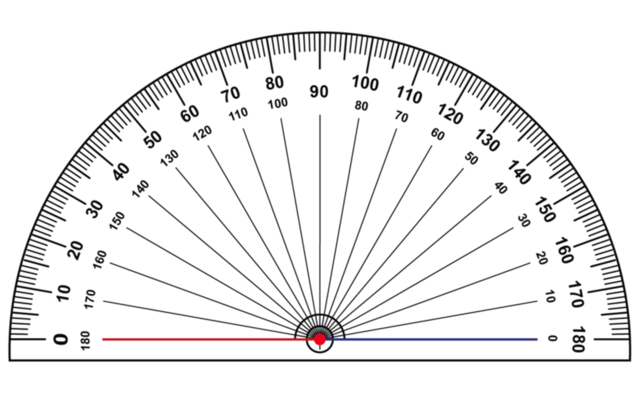
- There are two zero values on a protractor. If you begin measuring from the zero on the left hand side of the protractor, you use the outer scale on the protractor.
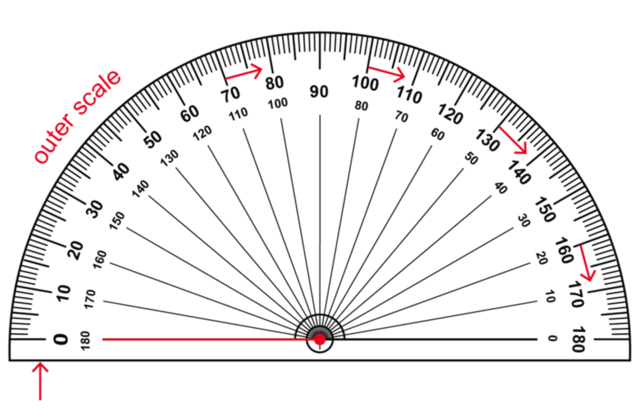
If you begin measuring from the zero on the right hand side of the protractor, you use the inner scale on the protractor.
Types of angles
Different types of angles have different names. Let’s revise the names of the different angles that you may need to use in this section.
| Acute angle: between \(0^{\circ}\) and \(90^{\circ}\) |  |
| Right angle: angle = \(90^{\circ}\) |  |
| Obtuse angle: between \(90^{\circ}\) and \(180^{\circ}\) |  |
| Straight angle: angle = \(180^{\circ}\) |  |
| Reflex angle: between \(180^{\circ}\) and \(360^{\circ}\) |  |
| Revolution: angle = \(360^{\circ}\) |  |
Dividing a circle into six equal parts
Here is a fun activity for you to complete in pairs or small groups.
You will need a ruler, a pencil and a compass.
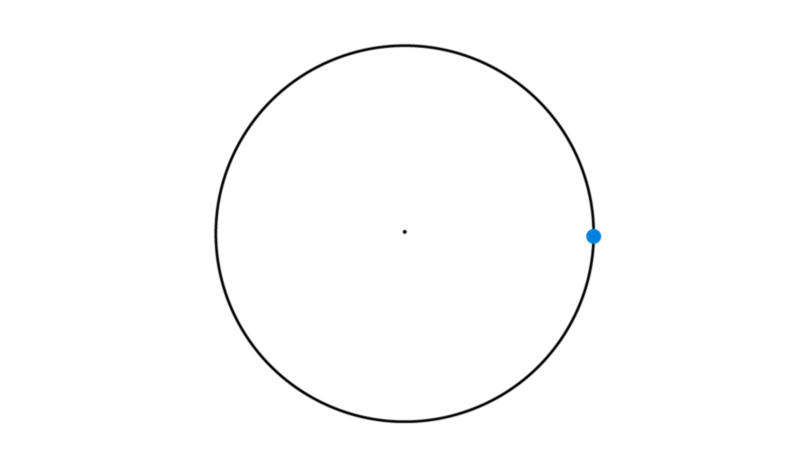
- Use a compass to draw a circle. Keep the width of the compass the same for the whole activity.
- Mark a point anywhere on the circumference of the circle.
- Put the compass on the point and start to make small arcs on the circumference of the circle.
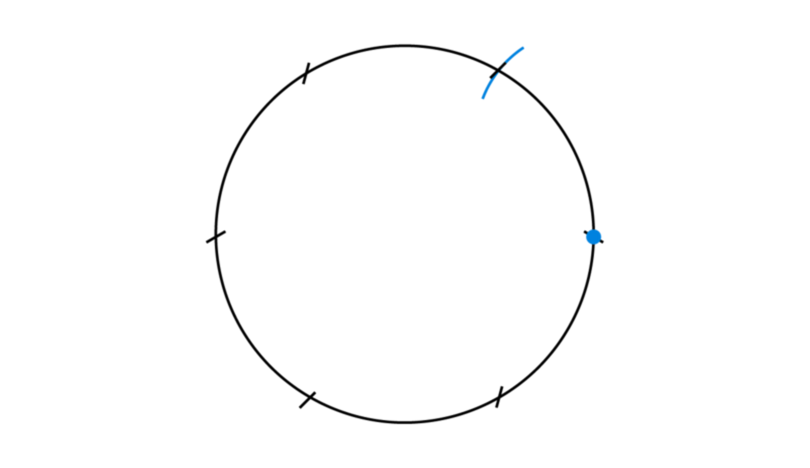
- How many equally spaced marks can you make around the circumference of the circle?
- Draw a line that joins each point on the circumference with the centre of the circle.
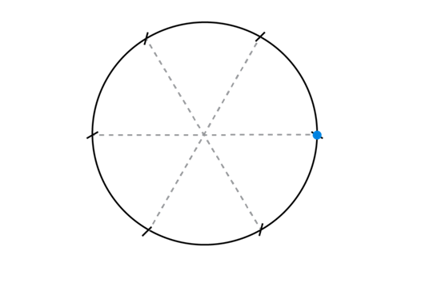
- How many angles are formed at the centre of the circle?
- Complete the following sentences:
- A full revolution is equal to \(\ldots^{\circ}\).
- The sum of the angles around a point is equal to \(\ldots^{\circ}\).
- Use your answer to Question 7 to complete the calculation to find the size of each angle formed at the
centre of the circle:
\(\frac{\ldots{^\circ}}{6} = \ldots^{\circ}\) - Use your protractor to confirm your answer to Question 8.
- So we have shown that the angles around a point = \(\ldots ^{\circ} = 6 \times \ldots^{\circ}\)
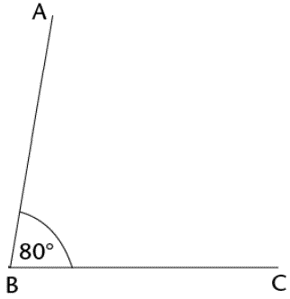
Worked Example 10.4: Bisecting a given angle
Use a compass to bisect angle \(A\hat{B}C = 80^{\circ}\).
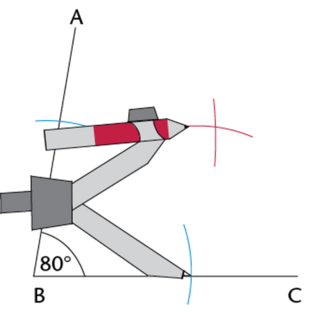
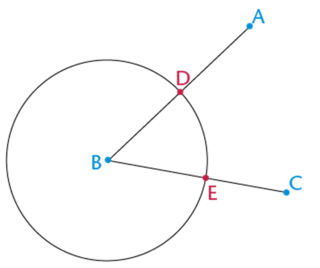
Construct arcs that intersect the arms of the angle.
Place the compass on the vertex of the angle (point \(B\)). Draw an arc across each arm of the angle (shown as blue arcs in the diagram below).

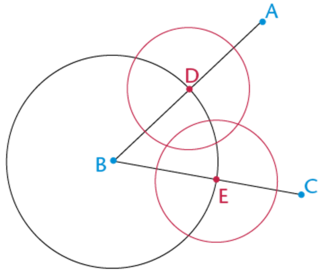
Construct intersecting arcs between the arms of the angle.
Place the compass on the point where one arc intersects an arm of the angle and draw an arc inside the angle. Without changing the compass width, repeat for the other arm of the angle so that the two arcs intersect (shown as red arcs in the diagram below).
Draw a line from the point of intersection to the vertex of the angle.
Use a ruler to join point \(B\) to the point where the arcs intersect (point \(D\)).
\(BD\) is the bisector of \(A\hat{B}C\).
\[A\hat{B}D = D\hat{B}C = 40^{\circ}\]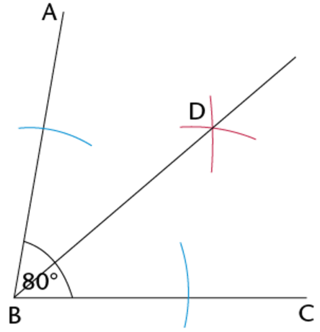
In the previous worked example, the size of the angle was given, \(A\hat{B}D = 80^{\circ}\). We can use the same method on any angle, even if the size of the angle is unknown. In other words, we do not need to know the size of an angle to bisect it using a compass.
Bisecting angles
Use a ruler to draw any acute angle, \(M\hat{N}P\).
- Use a compass to construct \(NQ\), the bisector of \(M\hat{N}P\).
- Use a protractor to measure the size of \(M\hat{N}P\).
- Does \(M\hat{N}Q\) = \(Q\hat{N}P\)? Use a protractor to measure each angle to check the accuracy
of
your construction.

Use a protractor to draw each of these angles:
- \(K\hat{L}M = 50^{\circ}\)
- \(P\hat{Q}R = 90^{\circ}\)
Now use a compass to bisect each angle.

Use a ruler to draw \(\triangle XYZ\). Choose any lengths for the sides of \(\triangle XYZ\). All the interior angles must be less than \(90^{\circ}\). An example triangle is shown below.

- Use a compass to bisect \(X\hat{Y}Z\).
- Use a compass to bisect \(Y\hat{Z}X\).
- What do you notice about these two lines?
- Do you think that your observation about the bisector of \(X\hat{Y}Z\) and the bisector of \(Y\hat{Z}X\) would also be true for the bisector of \(Z\hat{X}Y\)?
- Confirm your answer to question (d) by constructing the bisector of \(Z\hat{X}Y\).
Use a ruler and a protractor to draw \(T\hat{R}S = 70^{\circ}\). Use a compass to bisect \(T\hat{R}S\).
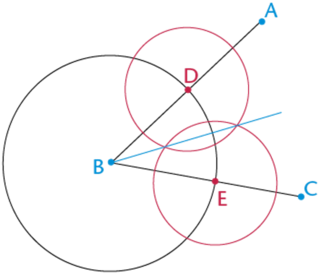
Kobus used a compass to bisect an angle. As shown in the diagrams below, Kobus used full circles in his construction (instead of arcs).
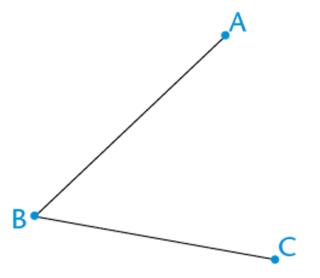
- Look at diagram 1. What type of angle is \(A\hat{B}C\)?
- Write a short sentence for each diagram describing the method used for each step of the construction. Use your own words and make your sentences as simple as possible.
- Diagram 1:
- Diagram 2:
- Diagram 3:
- Diagram 4: